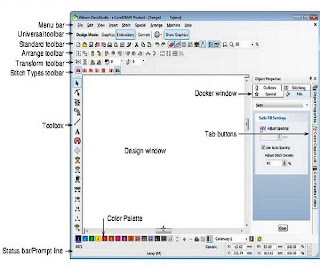
DecoStudio es program takes care of embroidery, vector art creation, monogram and art Appliqué. Appliqué is decoration or trimming cut from one piece of fabric andstitched to another to adddimension and texture. Appliqué desidn can be more economical than embroidery alone. Here free tutorial to learn how to create appliqué design with DecoStudio es in a few minutes.
Embroidered design composed of one or more letters, usually the initials of a name, in some case also consist of borders or designs. Below are free tips and a video with Wilcom Deco Studio es to show you a small sample of how to create appliqué designs from the appliqués tool and the Graphic Mode in Wilcom DecoStudio e1.
This free tutorial is a part of promotional product which uploaded by wilcomdiscovery
Create striking appliqué design with the Wilcom’s appliqué tool which automatically builds all the tack-down, base and finishing stitches your machine requires. Automated monogram and applique toolsAutomated monogram and appliqué tools. Use Auto Appliqué to produce all the stitching you require for appliqué objects. Up to four layers of stitching can be generated for each appliqué object, depending on current settings. When you stitch out an appliqué object, the machine stops between layers. When the guide run has been stitched, lay the appliqué patch over the design and re-start the machine. Or, if using a cutting line, place the fabric over the guide run then trim in position afterthe cutting line has been stitched. Start the machine again for tack and cover stitching.
Use Tag as Appliqué (Universal toolbar) to tag a vector object for conversion to appliqué and Convert (Universal toolbar) to convert vector objects to embroidery objects.
 |
| click on pict to display larger free decostudio es tips |
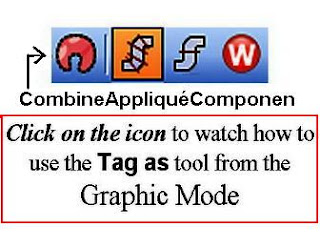
In DecoStudio Graphics mode, the Tag as Appliqué button allows you to tag selected vector objects for conversion to appliqué. The button is disabled until an applicable object is selected in the design window. There are a couple of ways of adjusting the offset of the Appliqué. The Appliqué is really created with your line tools . You can also adjust your Appliqué size. The easy way to do this is (trick) to break the appliqué apart so you have them as a Run object and input C objects. Then you can convert them to any other line objects.
So make a copy of the run stitch that was created for your appliqué placement then while the run object is selected click your input C tool (or right click the object and select Convert to Input C). This will prompt you to defined the width of you column instead of defending the width with your left mouse button use your right mouse button this will create the offset from the line.
Then you can delete the old coverage stitch object.
Then you can delete the old coverage stitch object.
If you had more than 1 Appliqué you can use the Combine Appliqué Components and this will also brake it apart as shown on the top 2 A. When an object is selected try right clicking to bring up a menu, you can also right an object from your Color-Object List.
Wilcom embroidery programs are easy use to create appliqué design if you know how to use the program, it is worth to spend more time to explore appliqué tools in your DecoStudio es program.

This comment has been removed by the author.
ReplyDeleteThis comment has been removed by the author.
ReplyDelete